
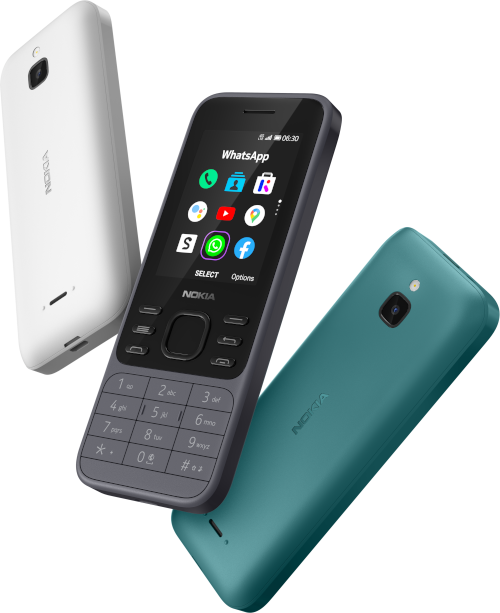
Nokia 8000 4G & Nokia 6300 4G (2020)
Nokia 8000 4G and Nokia 6300 4G are both devices running KaiOS 2.5.4, released in the autumn of 2020:
Nokia 8000 4G has a 2.8-inch wide display with 240 x 320 pixel resolution (QVGA) and features a classic 2 MP camera with flash;
Nokia 6300 4G is cheaper, because it has a 2.4-inch display and a poor 0.3MP camera.

Like all the other KaiOS devices produced by HMD, both are debug-enabled with a working debug code, *#*#33284#*#*, which allows you to use ADB and WebIDE. However, what changes inside are the keys that can grant root privileges to users. On this page you will find the guide from forum.bananahackers.net, the our official forum.
Rooting guide
by LuxferreUse the following index to better navigate through the various steps required to gain root privileges on Nokia 8000 and Nokia 6300:
NOTE that permanent root by replacing partitions voids the warranty and blocks updates, use at your own risk. Read and understand the guide carefully to be able to backup all partitions using the tools we provide, in case something goes wrong or if you want to re-enable official updates.
Requirements
By clicking on the links below, you will be redirected to the site or guide for each of the following components:
a non-US-based Nokia 8000 or 6300 4G (in my example, it's 8000 4G TA-1303);
a working Docker's installation (see https://docs.docker.com/compose/install);
a working Git's installation (see https://git-scm.com/book/en/v2/Getting-Started-Installing-Git);
a (somewhat) working firehose loader MBN file for your phone (see edl.bananahackers.net);
a method to replace partitions via EDL tools, in this example all the instructions are about the bkerler's edl.py v3.1 release (for its guide see https://github.com/bkerler/edl);
the previous edl.py tool also needs a working Python's installation, in these examples will be used Python 3.9 (https://www.python.org). If you use Linux, depending on your distribution, you may want to use python3 command instead of just python used in the examples;
the last thing you need is an image of Gerda Recovery for Nokia 8110 4G, also compatible with these new Nokia devices at least to use ADB, through a white screen (you can download it from here or here).
NOTE: Windows users can also rely on proprietary software such as QFIL and QSaharaClient.
Preliminary phase
Before you start: enter EDL mode
Switch the phone into EDL mode, there are two ways:
from the turned on state, if you have ADB working, enable the debug mode using the "secret" code *#*#33284#*#* then connect the phone to the PC using an USB cable and run from the command line/terminal/prompt/shell the following command: adb reboot edl
from the turned off state, insert USB cable while holding * and # at the same time.
In both the cases, the screen should blink with KaiOS logo and become black. Now you're ready to go!
Replace the stock recovery with a custom one (i.e. Gerda Recovery)
First of all we need to replace the Recovery Mode with a custom one with root privileges, as we have already seen, Gerda Recovery for Nokia 8110 4G is OK for us. Once we have installed it we can manage everything on the phone using ADB as root.
WARNING! At the first "normal boot", a script inside the system partition will replace your custom recovery with the stock one, in case of problems you probably cannot boot the phone in normal mode nor in recovery mode. Be aware! Anyway, you can always correct everything in EDL mode using your backup files, without worrying.
1. Switch the phone into EDL mode.
2. Assuming that the system partition will restore the stock recovery at the first normal boot, we can act directly this way. Flash the Gerda Recovery using the command:
python edl.py w recovery /path/to/recovery-8110.img --loader=/path/to/8k.mbn
Where "python" uses the "edl.py" script to select the "recovery" partition to flash with your "recovery-8110.img" file (it's the name we normally use for Gerda Recovery, but you can rename it differently, for example recovery.img, something.img, etc...) placed in the folder you prefer (for example, /path/to/ can be /Francesco/Downloads/ and so on...), and to perform this, edl.py needs its *.mbn firehose loader (here is named 8k.mbn) placed wherever you want.
3. Without doing anything else, disconnect the phone from PC and remove the battery. Then insert the battery back.
Leave the phone turned off for now... until you've finished to learn the three important Stages listed below, needed for the permanent root of your phone.
Rooting process
Rooting process is divided into three stages:
boot partition pulling;
boot image patching;
boot partition replacing.
Let's review them one by one.
Stage 1: Pulling the boot partition image
1. Turn the phone on while holding the * key only. Normally, it should boot into stock recovery, but now it should boot into a white screen (that's totally normal, 8110's and 8000's display drivers are different).
2. Connect the phone back to the PC and check if ADB can lists it, use the command adb devices
3. Pull the boot image from the phone using the command:
adb pull /dev/block/bootdevice/by-name/boot boot.img
4. Reboot the phone into normal mode with adb reboot or, if it doesn't work, just by reinserting the battery.
Now we have the boot.img pulled from the phone and recovery automatically restored to stock. Let's patch our boot!
Stage 2: Patching the boot partition image
Note: keep the original boot.img file backup somewhere safe in case you need to restore it (for instance, to re-enable stock OTA updates)!
1. Pull/clone the patcher image source using the git command (just copy/paste this command):
git clone https://gitlab.com/suborg/8k-boot-patcher.git && cd 8k-boot-patcher
2. Build the patcher image using docker:
docker build -t 8kbootpatcher . (note the dot in the end of this command it's important)
3. Ensure that the boot.img file is called exactly boot.img and put it wherever you want (for example, /path/to/image/dir).
4. Run the patching process according to the README file inside the 8k-boot-patcher folder:
docker run --rm -it -v /path/to/image/dir:/image 8kbootpatcher
5. The boot.img will be patched. The original file will be copied into boot-orig.img.
Stage 3: Replacing the boot partition with the patched image
1. Switch the phone into EDL mode again.
2. Flash the patched boot.img file to the boot partition:
python edl.py w boot /path/to/patched/boot.img --loader=/path/to/8k.mbn
3. Reboot the phone to the normal mode, just use the command: python edl.py reset
That's it! Now, if you enter the command adb shell, your can already use the shell as root, the command getprop ro.secure will return 0 and the command getenforce will return Permissive. Just as planned (if you want learn more about the permanent root in /boot, go to the dedicated guide).
How to restore everything (to get back OTA updates)
To restore the stock boot, repeat stage 3 (see above) using the original boot.img backup made in stage 1.