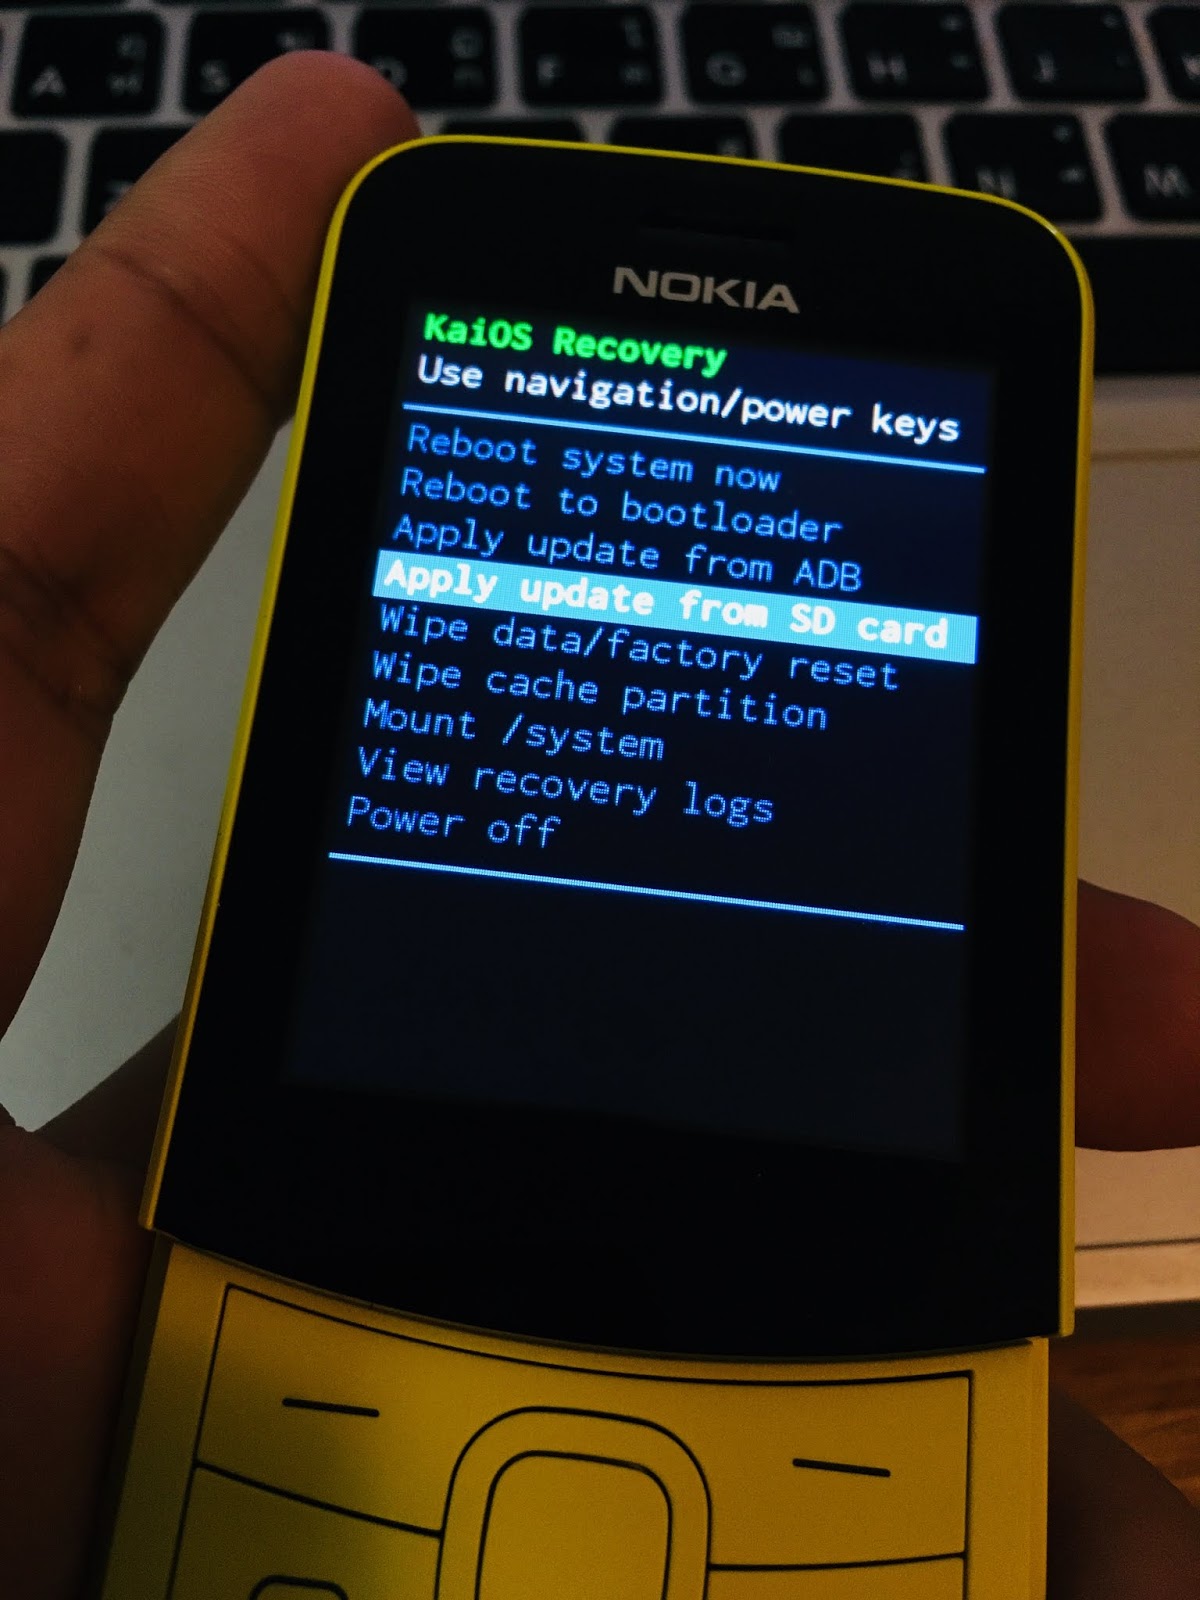
RECOVERY MODE
What is the Recovery Mode?
Recovery Mode is a way of starting a device from which it is possible to manage various operations on the system partition as well as from root. When test keys are active, the user has endless possibilities between flashing partitions, restoring and installing various parts of the system or, more safely, direct intervention on the user's data partition.
To access it through ADB use the command:
adb reboot recovery
In many cases this partition is patched by the device manufacturer so as to prevent the end user from being able to perform operations such as de-branding and installing third-party software, or even installing a new operating system on the device.
The partition integrity check is managed in most cases by a file on the system partition which, through a script, reinstalls the original partition at the first boot: /system/bin/install-recovery.sh
By disabling the aforementioned file the warranty is lost, but in return you will be able to permanently get your customized Recovery.
However it is possible to use a personalized Recovery also temporarily, and then restore it automatically at the first start, just in time to perform the operations necessary to the user.
Why is so important to replace the stock Recovery?
With a dev-key recovery we have no permissions to execute zips. Only signed updates are accepted on a stock recovery.
With a custom Recovery we can flashing every other zip we need on our devices or to be able to use ADB from Recovery Mode.
Get a copy of your stock Recovery
Use a temporary root access on your device and perform dd from ADB shell:
dd if=/dev/block/bootdevice/by-name/recovery of=/sdcard/recovery.img bs=2048
the recovery.img file will be saved on the SD card.
How to made your custom recovery?
by speeduploop
Add the test-keys: for KaiOS and Android
This guide will allow you to add test keys to your stock Recovery. It should also work for Android smartphones.
All we need are abootimg installed (on linux it should be already installed, if not install it from the repository) and a test-key, here the one from Nokia 8110 4G with Firmware v12.
In addition, ADB root support can also be implemented using a ADBD rooted binary file, but this is optional, only if you want to permanently replace the Recovery:
1) Create a new folder and put your recovery.img there, with the keys.v12 file;
2) Open a terminal into the new folder and perform the following commands, we will do the operation in three blocks:
a. in this way you extract the recovery.img and the internal initrd.img that contains the essential files
abootimg -x recovery.img
abootimg-unpack-initrd
b. with these commands you remove the stock dev-keys in /ramdisk/res/ and replace them with the keys from the keys.v12 file
rm ramdisk/res/keys
cp keys.v12 ramdisk/res/keys
Normally only the adb sideload command can be used,but only packages signed by OEMs can be flashed. In case you want to use ADB as root in recovery mode, you can proceed in this way (OPTIONAL):
b1. with these commands you remove the stock ADBD binary in /ramdisk/sbin/ and replace it with the new one
rm ramdisk/sbin/adbd
cp adbd ramdisk/sbin/adbd
b2. now you have to edit the default.prop file in this main folder
cp ramdisk/default.prop ./
use a text editor and change the following values:
ro.debuggable must be 1 (in this way the device is able to use debug);
ro.adb.secure must be 0 (needed to enable ADB, it is often enabled by default).
now push again the default.prop file in its place:
rm ramdisk/default.prop
cp default.prop ramdisk/default.prop
c. with these commands you remove initrd.img from the main folder, repack the new one end rewrite it in recovery.img
rm initrd.img
abootimg-pack-initrd
abootimg -u recovery.img -r initrd.img
Now your custom recoveri.img is ready to be flashed!
How to replace the Recovery?
In this part of the guide we will follow two steps, everything depends on whether your custom recovery will be a temporary (from point 1 to point 5) or a permanent (point 6) replacement.
Temporary replacement
1) Use your custom recovery (if you have a Nokia 8110 4G you can check the dumps here);
2) Rename the file as recovery.img to simplify the operation;
3) Put the file on the sdcard;
4) Chose a way to get a temporary root shell;
5) Replace the Recovery with the following commands:
adb shell
dd if=/dev/block/bootdevice/by-name/recovery of=/sdcard/recovery-backup.img bs=2048
dd if=/sdcard/recovery.img of=/dev/block/bootdevice/by-name/recovery
Now your recovery is temporarily replaced. If your system is clean, an internal script will reinstall the recovery stock on the next reboot. In the meantime you can use, for example, the backup tools, such as dumpall.zip, and once finished, just start the phone normally to restore the recovery to the stock.
Repeat steps 1 to 5 every time you need to temporarily resort to a custom recovery.
If, however, you want to permanently replace your custom recovery, go to the next step.
Permanent replacement
Now we made a backup of the stock Recovery and have replaced it with a custom one. This passage is important if you want temporary use the new recovery without loosing the OTA updates, because you can use the custom one just one time, it will be replaced with the stock one at the first boot because the file /system/bin/install-recovery.sh;
6a) Now we need to disable integrity checking from the system partition. This will block official updates, but you can always restore it if you first backup your system partition, in this way:
dd if=/dev/block/bootdevice/by-name/system of=/sdcard/system-backup.img bs=2048
6b) Now that we have the system's backup we can disable the file that reinstalls the stock version of Recovery, /system/bin/install-recovery.sh
mount -o remount,rw /system
echo '#!/system/bin/sh' > /system/bin/install-recovery.sh
echo 'exit 0' >> /system/bin/install-recovery.sh
chown root:root /system/bin/install-recovery.sh
chmod 750 /system/bin/install-recovery.sh
sync
mount -o remount,ro /system
reboot

