CUSTOM FIRMWARE & PERMANENT ROOT for KaiOS and ANDROID
In this guide I will explain the procedure to activate ADB ROOT on a stock firmware on KaiOS and Android. This procedure carries a double risk: the loss of official updates (resolvable) or the rupture of the device (often irreversible).
Yes, replacing the original firmware with a custom one is a huge plus. In case of errors the device can incur in the best of cases in continuous reboot, but even there is the risk of not being able to turn on anymore. Proceed at your own risk!
What is the firmware?
"In computing, firmware is a specific class of software that provides the low-level control for the device's specific hardware. Firmware can either provide a standardized operating environment for the device's more complex software (allowing more hardware-independence), or, for less complex devices, act as the device's complete operating system, performing all control, monitoring and data manipulation functions.
Firmware is held in non-volatile memory devices such as ROM, EPROM, or flash memory. Changing the firmware of a device is nowadays a common procedure; some firmware memory devices are permanently installed and cannot be changed after manufacture. Common reasons for updating firmware include fixing bugs or adding features to the device." (source Wikipedia)
Qualcomm / Spreadtrum
Get a copy of your stock Boot
If you don't have a certified boot.img for your KaiOS / Android device on the Internet, take it using the shell. Use a temporary root access on your device and perform dd from ADB shell:
dd if=/dev/block/bootdevice/by-name/boot of=/sdcard/boot.img bs=2048
the boot.img file will be saved on the SD card.
Enable ADB root on your custom firmware
1) Create a new folder and put your boot.img there, with this rooted ADBD binary file (this one comes from GerdaOS);
2) Open a terminal into the new folder and perform the following commands, we will do the operation in three blocks (just like the previous guide about Recovery Mode, but the "b" block changes):
a. in this way you extract the boot.img and the internal initrd.img that contains the essential files
abootimg -x boot.img
abootimg-unpack-initrd
b1. with these commands you remove the stock ADBD binary in /ramdisk/sbin/ and replace it with the new one
rm ramdisk/sbin/adbd
cp adbd ramdisk/sbin/adbd
b2. now you have to edit the default.prop file in this main folder
cp ramdisk/default.prop ./
use a text editor and change the following values:
ro.debuggable must be 1 (in this way the device is able to use debug);
ro.adb.secure must be 0 (needed to enable ADB).
now push again the default.prop file in its place:
rm ramdisk/default.prop
cp default.prop ramdisk/default.prop
c. with these commands you remove initrd.img from the main folder and repack the new one, then rewrite it in boot.img
rm initrd.img
abootimg-pack-initrd
abootimg -u boot.img -r initrd.img
WARNING! You should get an error like this:
"boot.img: updated is too big for the Boot Image (MaxValue vs MinValue bytes)"
then get MaxValue and launch this last command:
abootimg -u boot.img -r initrd.img -c bootsize=MaxValue
Now your custom firmware is finally ready to be flashed!
Guides that explain how to replace partitions
Mediatek-based KaiOS phones
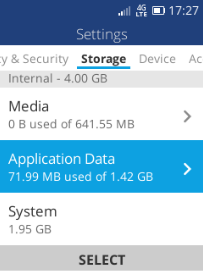
Swap/switch size between app data with sdcard internal
by Mus Tofa (on Discord)
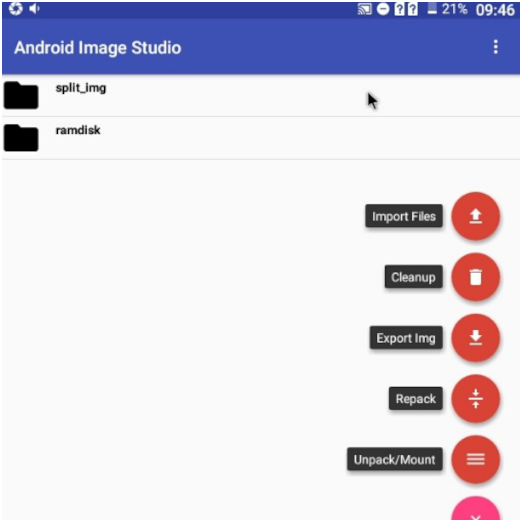
1. Dump your stock boot.img and unpack it, for mediatek device use android app called “android image studio” or for windows use app called “MTK Extractor”
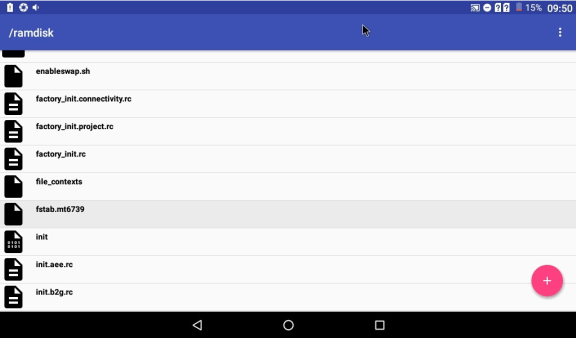
2. Open ramdisk folder edit file fstab with QuickEdit, swap this line...
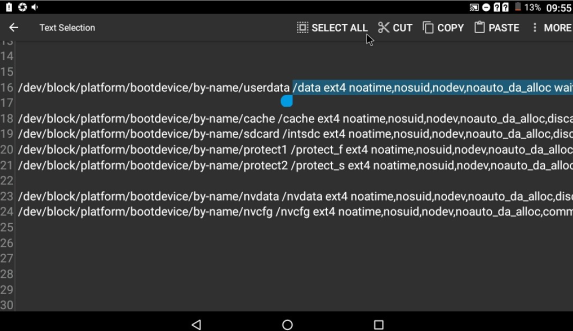
...with this line
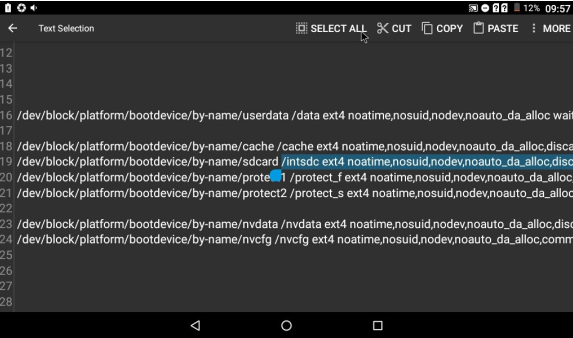
this must be the result:
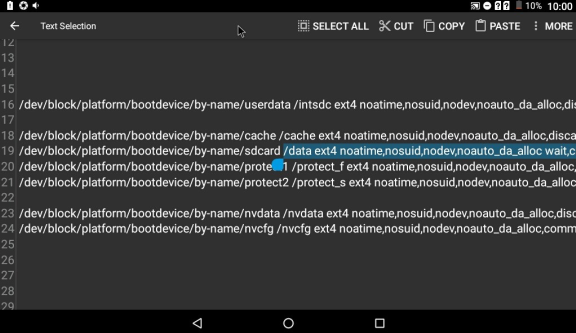
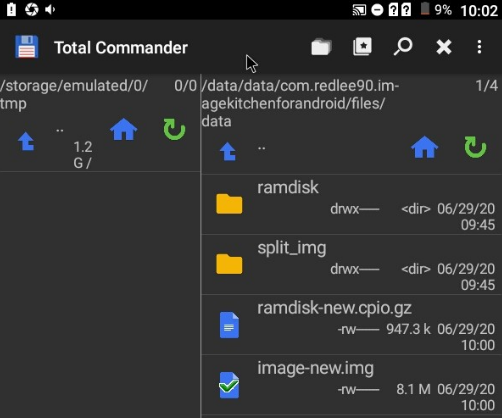
3. Repack it, export image-new.img to sdcard. If export command not work you can copy it directly with root explorer, this the place of the image-new.img:
4. Copy image-new.img to pc and rename to boot-new.img. Flash it to phone with fastboot, but before that you need unlock bootloader first to disable android verified boot. Because your phone will bootloop if android verified boot not disabled. If your bootloader can be unlocked without key then you can continue, if not then abort this tutorial:
fastboot oem unlock
fasboot flash boot boot-new.img
Note: if you want to OTA update firmware you must restore the original boot.img first
